Made these play dough stuffed balloons for the little guys to hold on to and squeeze and play with. Saw on Pinterest (of course) the great idea of putting little faces on them as well. It was a little difficult to hold the balloon open with both hands at the same time as trying to put play dough into it, but I managed to get it done with only minimal injuries to myself. Not only does this help with building the muscles in their hands, will also be bringing these guys out to talk about feelings with the toddlers. So much easier to have examples for them!
Showing posts with label for the classroom. Show all posts
Saturday, September 8, 2012
Discovery Jars ("dry")
These have been some of the most popular items in the room so far. I have these out on the table from the beginning and only put them away when it's time for lunch and nap. I found the jars at the dollar store near me and filled them with a variety of different objects and things to fill around them.
There are dinosaurs, colored dice, a ball and jacks set, buttons, beads and bells, even just a bag of poms that were special shiny ones. Some are in beans, some in rice, some just by themselves. All the lids are super glued shut for safety and I am keeping a close eye on them everyday to make sure no cracks appear (just in case they get dropped on the floor too many times).
Not pictured here are the "wet" ones I also made. Glitter jars that swirl, beads and sequins and even butterflies that float all around when turned. Those I'm holding back for now, and will be a floor only jar so less chance of being pushed off the table. Will post pictures of those when they come out.
There are dinosaurs, colored dice, a ball and jacks set, buttons, beads and bells, even just a bag of poms that were special shiny ones. Some are in beans, some in rice, some just by themselves. All the lids are super glued shut for safety and I am keeping a close eye on them everyday to make sure no cracks appear (just in case they get dropped on the floor too many times).
Not pictured here are the "wet" ones I also made. Glitter jars that swirl, beads and sequins and even butterflies that float all around when turned. Those I'm holding back for now, and will be a floor only jar so less chance of being pushed off the table. Will post pictures of those when they come out.
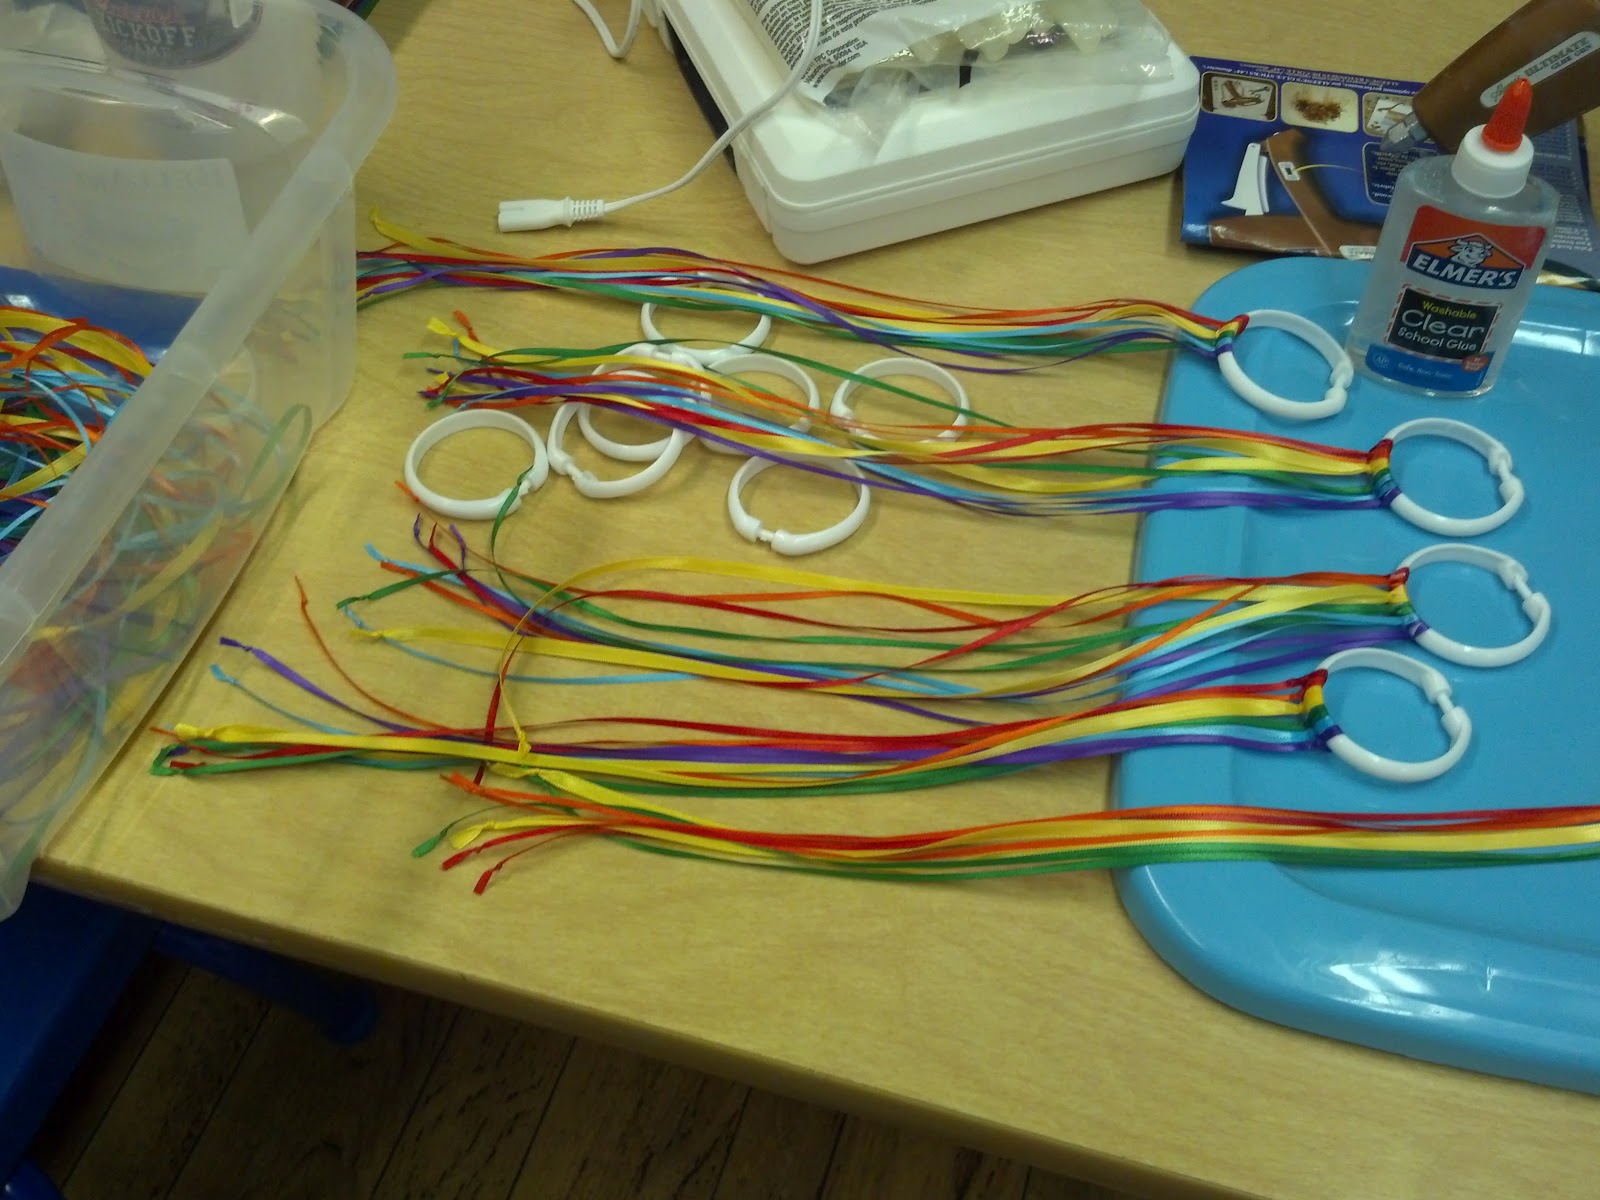
Rainbow Rings (for music time)
I made these Rainbow Rings for the little ones to use when we sing songs and listen to music. They can wave them around and not really hurt any others while doing it. I used shower curtain rings, ribbon, and glue.
These also really helped to calm a couple toddlers down during drop off time the other day. Combined these with blowing bubbles and we had a great distraction technique!
Friday, September 7, 2012
Room Tour (after pictures!)
Here is what 1 1/2 weeks of almost solid work can do to a room that looked like the before pictures in a previous post!
Our newly installed sink and counter. One of the things they added when they redid the rooms from before. So nice to have it in the room for cleaning up!
One of my bulletin boards. I stripped off all the old decorations and paper that was on it and there was a felt board under it all! Going to use it for some story times with cut out shapes and the little ones can also play on it with velcro'd pieces. Our little play pool currently filled with cut up pool noodles and our whale. This is already a favorite with my kids. They can't get enough of the pool noodle pieces!
Our big apple tree. The apples have their birthday's printed on them.
My farm wall. My kids go over to point at the different animals all the time! The blue tape on the wall is actually where a wall mirror is going to go in the next week or so. The kids love walking up to it and seeing themselves and making faces.
Rolling (and closing) toy cabinet for more storage.
Our table, chairs, and more storage for art supplies (including my art drying rack!)
Hooks for hanging their bags and lunches and our calendar.
Yes, I did end up duct taping my clip board as well for sign in time. :-)
It took a lot of hard work and sweat and maybe a few tears, but I am so proud of my classroom and the kids really seem to enjoy it so far.
I tried to go for a Farm theme since most little ones this age would be familiar with all the barnyard animals and such. So here is our welcome door, apples from our apple tree on our farm!
Here is the first view from the doorway! Such a difference! I wanted to make it as inviting as possible to the kids.
The by now infamous storage cabinet. Emergency bag hanging by the door with first aid, flashlight and emergency contact info. CD player out of reach of kids.
Our newly installed sink and counter. One of the things they added when they redid the rooms from before. So nice to have it in the room for cleaning up!
One of my bulletin boards. I stripped off all the old decorations and paper that was on it and there was a felt board under it all! Going to use it for some story times with cut out shapes and the little ones can also play on it with velcro'd pieces. Our little play pool currently filled with cut up pool noodles and our whale. This is already a favorite with my kids. They can't get enough of the pool noodle pieces!
Toy storage on the bottom, stuff that is easy for them to pull out and play with, nap mat and other storage up above where they can't reach
Our big apple tree. The apples have their birthday's printed on them.
My farm wall. My kids go over to point at the different animals all the time! The blue tape on the wall is actually where a wall mirror is going to go in the next week or so. The kids love walking up to it and seeing themselves and making faces.
Rolling (and closing) toy cabinet for more storage.
Our table, chairs, and more storage for art supplies (including my art drying rack!)
Hooks for hanging their bags and lunches and our calendar.
Yes, I did end up duct taping my clip board as well for sign in time. :-)
It took a lot of hard work and sweat and maybe a few tears, but I am so proud of my classroom and the kids really seem to enjoy it so far.
Art Drying Rack
With a classroom this small, plus really young toddlers, it's a problem doing artwork because there isn't anywhere to lay something to dry that they can't get to and possibly make a bigger mess with. So i solved the problem by making my own drying rack (thank you Pinterest for the idea!)
I called my local pizza place, explained I was a teacher and was hoping to buy several unused large pizza boxes from them for a project for the classroom. They were very accomodating and let me have them for a great deal. So I went and picked them up along with some more....you guessed it....DUCT TAPE!
Cut the front flaps off of all the boxes....
Stacked them....
made sure to tape the front edges so that it wouldn't be rough edges (plus just looked better)...
Then duct taped the entire thing together on ALL sides. Made it pretty darn sturdy and really great looking. After i was done, i took plain blue duct tape and put small pieces on the front edges with each child's name, one per slot. Makes it super easy to put something in really quick to get it out of the way of little hands without worrying about forgetting to put their name on it and mix it up with another child. Plus I can just re-tape over the name whenever the new year starts for another child's name.
I called my local pizza place, explained I was a teacher and was hoping to buy several unused large pizza boxes from them for a project for the classroom. They were very accomodating and let me have them for a great deal. So I went and picked them up along with some more....you guessed it....DUCT TAPE!
Cut the front flaps off of all the boxes....
Stacked them....
made sure to tape the front edges so that it wouldn't be rough edges (plus just looked better)...
Then duct taped the entire thing together on ALL sides. Made it pretty darn sturdy and really great looking. After i was done, i took plain blue duct tape and put small pieces on the front edges with each child's name, one per slot. Makes it super easy to put something in really quick to get it out of the way of little hands without worrying about forgetting to put their name on it and mix it up with another child. Plus I can just re-tape over the name whenever the new year starts for another child's name.
Transformation of a cabinet
Remember that ugly old metal storage cabinet in the back of one of the before pictures of my classroom?
It's amazing how bright it makes the room! So now not only is it nicer to look at (bring your sunglasses, lol), but it also doubles as my magnet board for the little ones to use. Really happy with how it turned out.
Yeah, that's the one. Not too pretty looking is it? I didn't think so either. Time to change that. Lets just say I got a little too happy with the decorative duct tape I found.
Such a huge difference even a little makes! But wait, there's coordinating duct tape for the border as well!
It's amazing how bright it makes the room! So now not only is it nicer to look at (bring your sunglasses, lol), but it also doubles as my magnet board for the little ones to use. Really happy with how it turned out.
The beginning - before shots of new classroom
We had a lot of construction done at our school this summer in order to make several more rooms in the building available for use for our older kids classes, plus re-doing the existing classrooms to make them ready for our infants and toddlers. Here are the before shots of what I got as my "blank slate" for my Toddler 1 room.
So much to do, but so many options!!!
Subscribe to:
Posts (Atom)